

Howdy, Stranger!
It looks like you're new here. If you want to get involved, click one of these buttons!
Categories
- 231.8K All Categories
- 22 >> Start Here <<
- 12 New Members
- 8 FAQs
- 83.3K Gear
- 37.9K Guitar
- 3.2K Acoustics
- 1.3K Bass
- 14.1K Amps
- 16.7K FX
- 157 Digital & Modelling
- 730 Other Instruments
- 7.9K Making & Modding
- 406 Gear Reviews
- 100 Guitar Reviews
- 72 Amp Reviews
- 119 FX Reviews
- 84 Other Reviews
- 734 Made in the UK
- 932 Theory
- 1.8K Technique
- 2K Live
- 3K Studio & Recording
- 2.1K Making Music
- 202 Events
- 15 Guitar Show 2018
- 762 Plug My Stuff
- 100.6K Classifieds
- 39.2K Guitars £
- 2.6K Acoustics £
- 132 LH Guitars £
- 836 Basses £
- 10K Parts £
- 17.6K Amps £
- 32.8K FX £
- 2.6K Studio & Rec £
- 5.8K Misc £
- 443 Personnel
- 52.7K Chat
- 35.3K Off Topic
- 987 Tributes
- 6.3K Music
In this Discussion
Become a Subscriber!
Subscribe to our Patreon, and get image uploads with no ads on the site!
Lightweight fretless bass build 30" scale
 JGTay
Frets: 209
JGTay
Frets: 209
The plan is for a laminated through neck of beech & mahogany (what I had to hand) which was started yesterday and the body wings will hopefully be a poplar core with walnut top and bottom. I already have the poplar left over from the dismantled piano and need to source some walnut. This will hopefully end up being the thinnest build I have done, looking at between 24-28mm, should help keep the weight down and it will have one pickup with volume & tone control.
This may take a while compared to my usual builds (average time has been 6 weeks start to finish). Funds are non existent, so parts will be as and when money comes in, and in the meantime it is a case of using what I have to hand. I am planning on making a pickup for this, already done a test pickup with thicker wire stock taken from an old extractor fan which only had enough for 2000 winds (completely hand wound...), it worked well but had a very low output and would require a preamp to boost it. I may well use the test pickup in a future build with a preamp, but will need to buy some wire for this one. I may even try making a humbucker.
The through neck pieces were cut to size, squared and glued together yesterday. Then this morning I glued on the 'ears' for the headstock (lots of squeeze out), did a quick sketch of the body shape and after removing the clamps I tried it in position with the rough body shape cut out of cardboard. The shape may change, but the main purpose was to work out the upper horn positioning to end above the 12th fret location for balance.
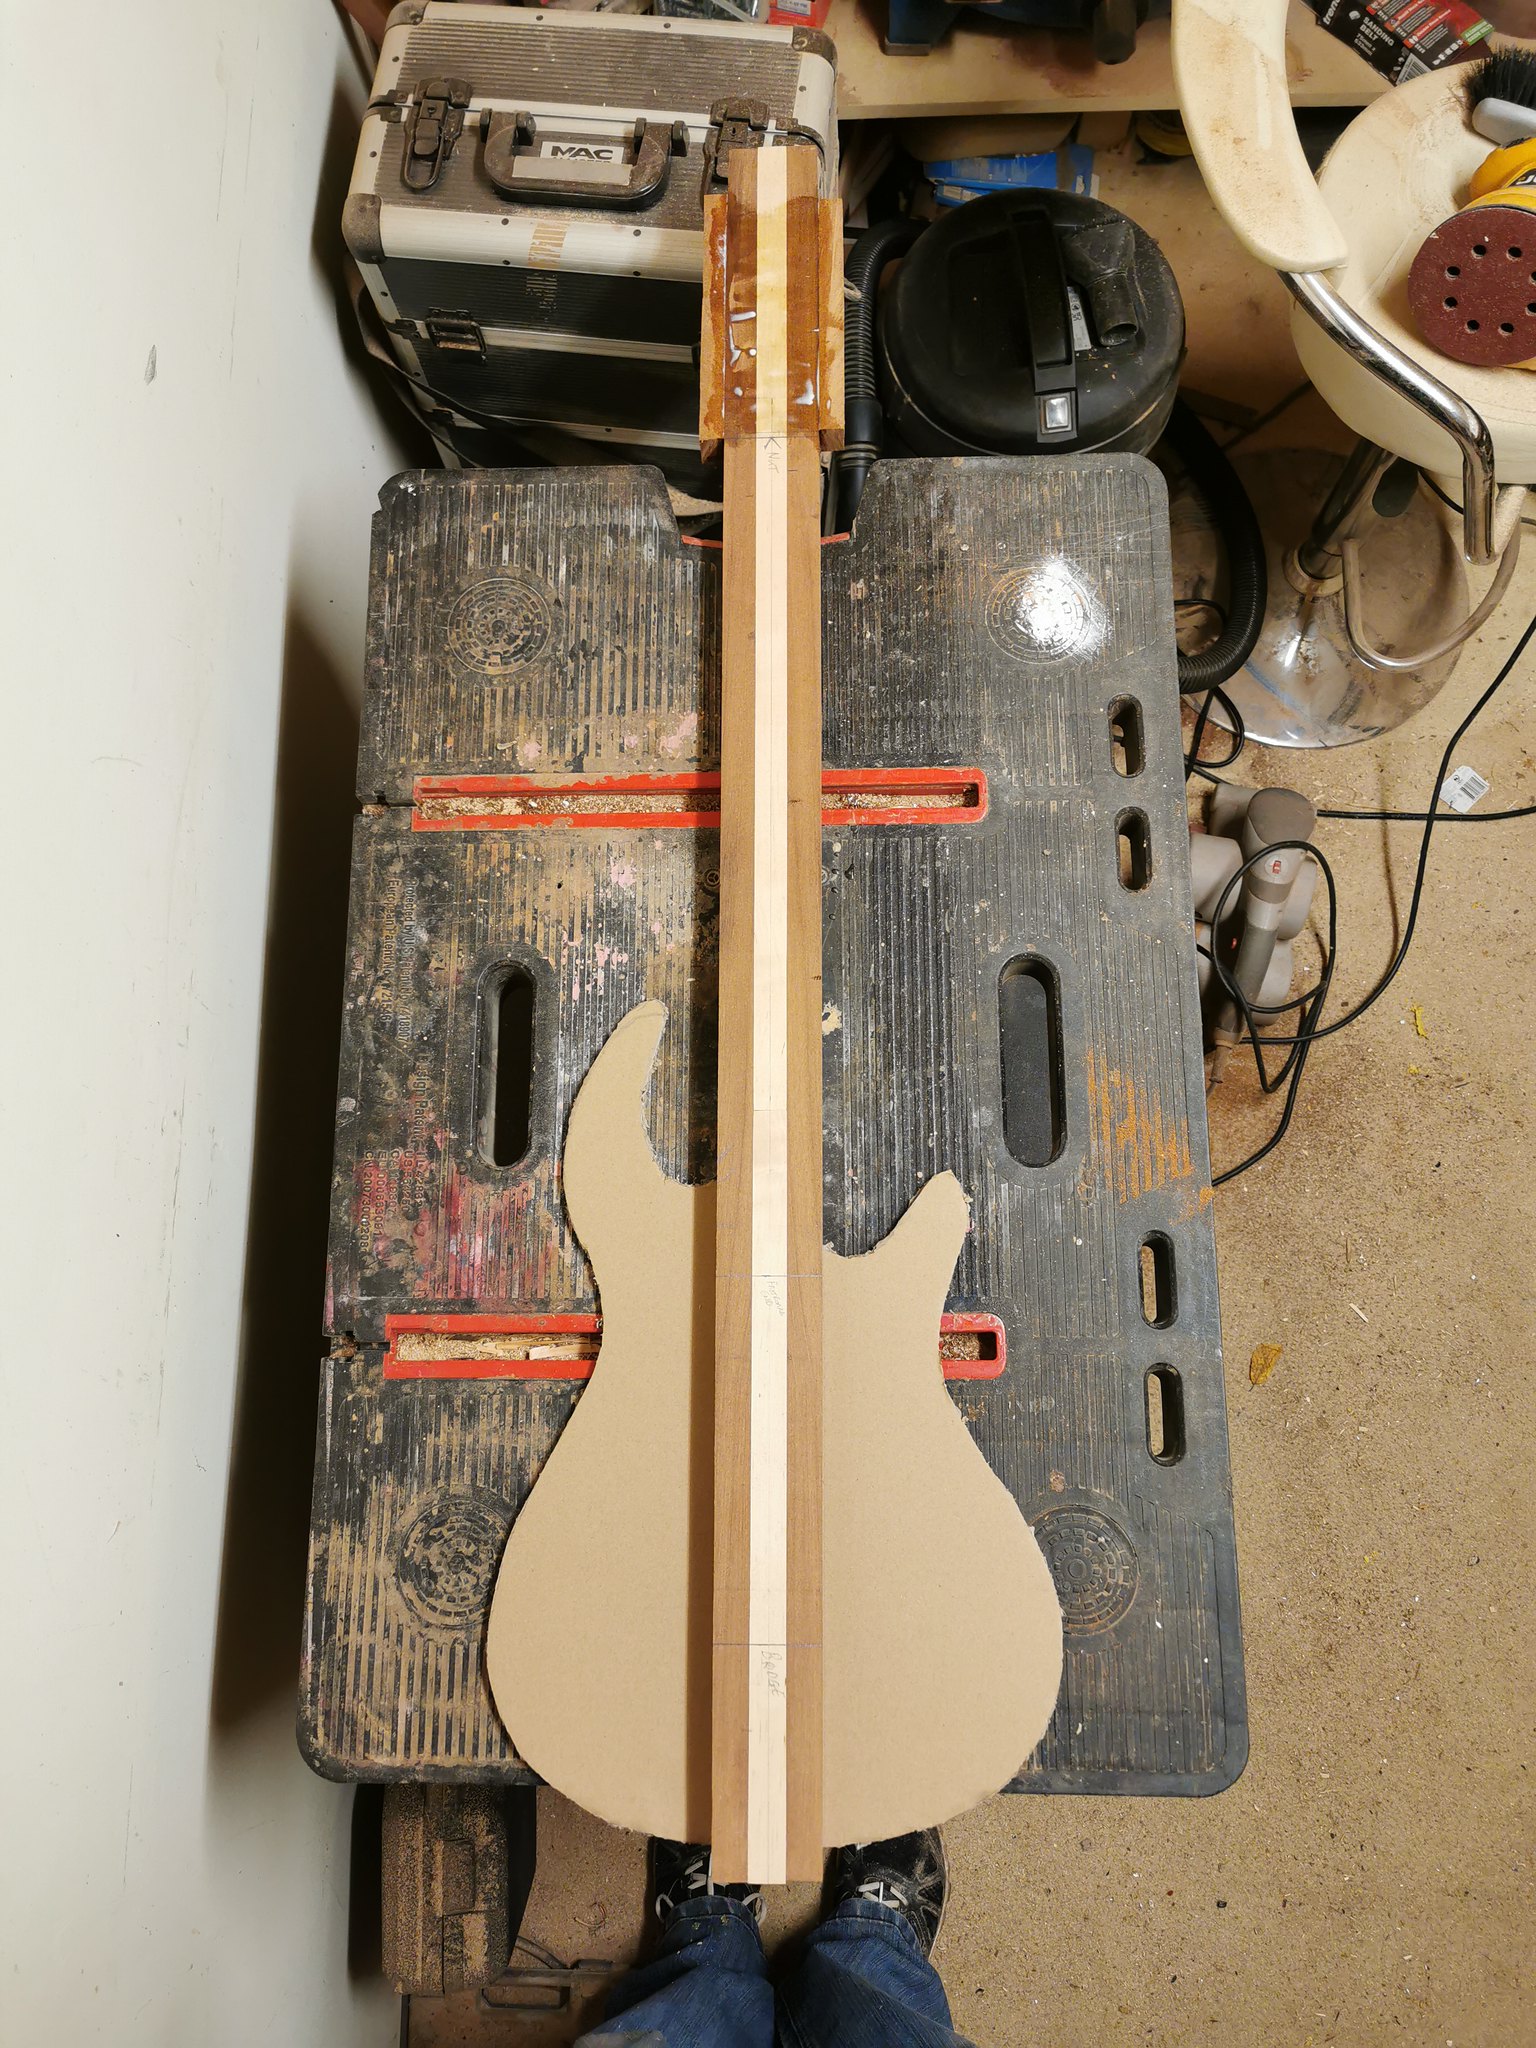
After giving the 'ears' enough time to dry I set about cutting the headstock angle at 9 degrees.
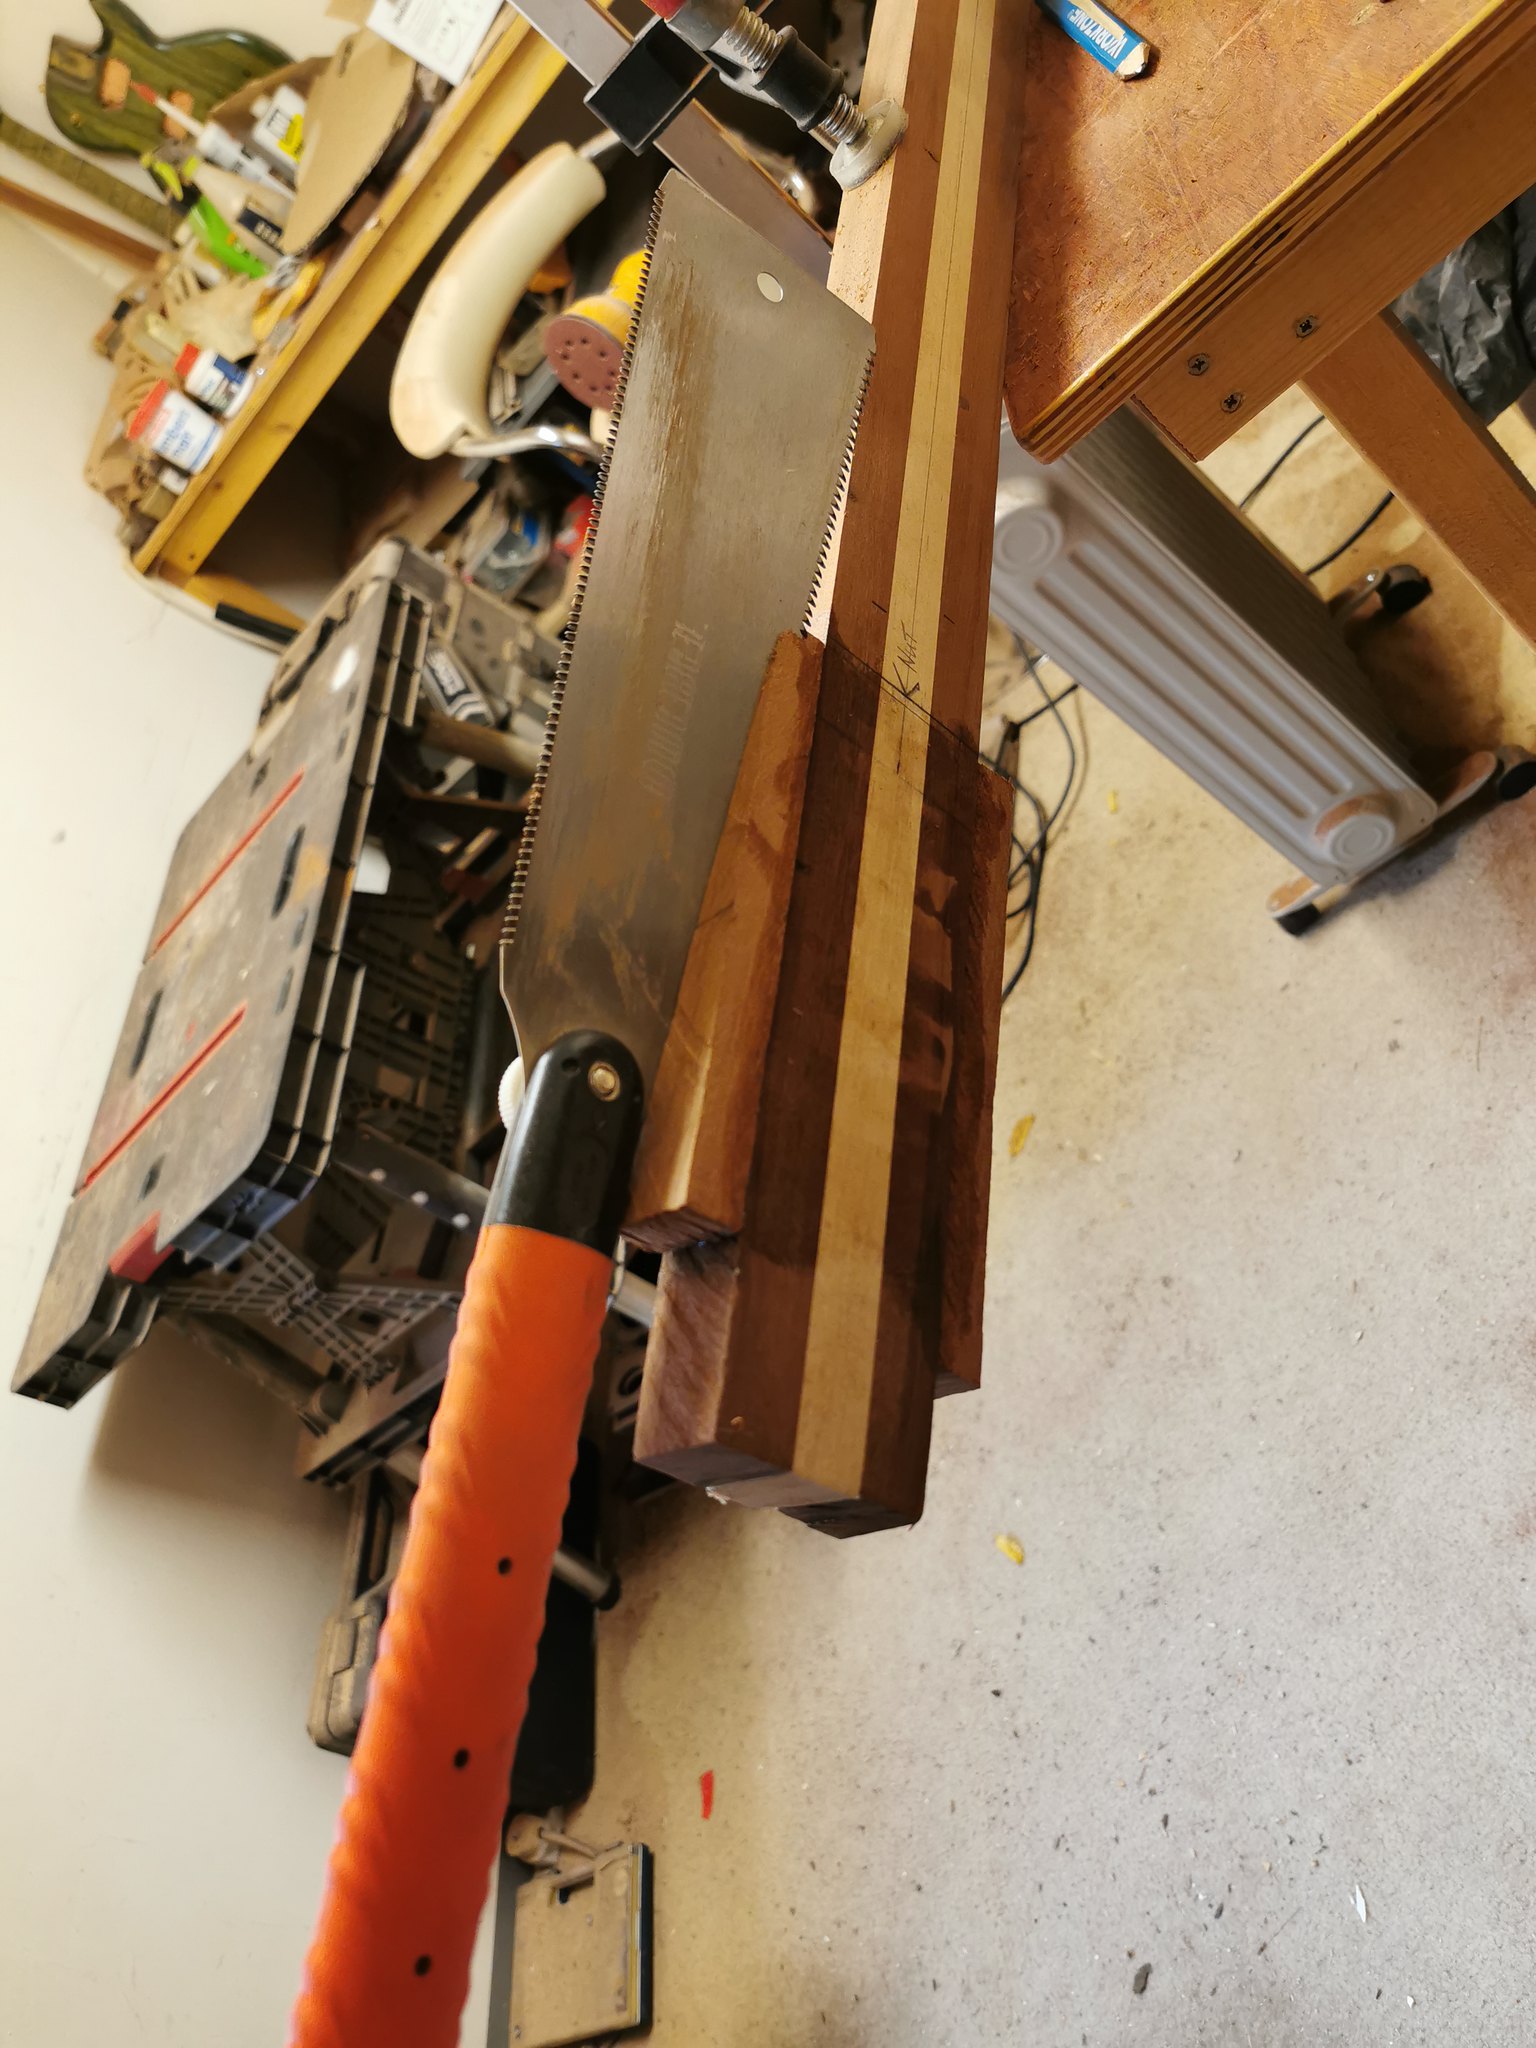
After that I glued the cut-off to the back of the headstock to provide enough thickness across the length and then set about working out string positions based on 17mm string spacing at the bridge and a 38mm nut so that I could do the positions of the tuners and get a basic shape sketched in for the headstock.
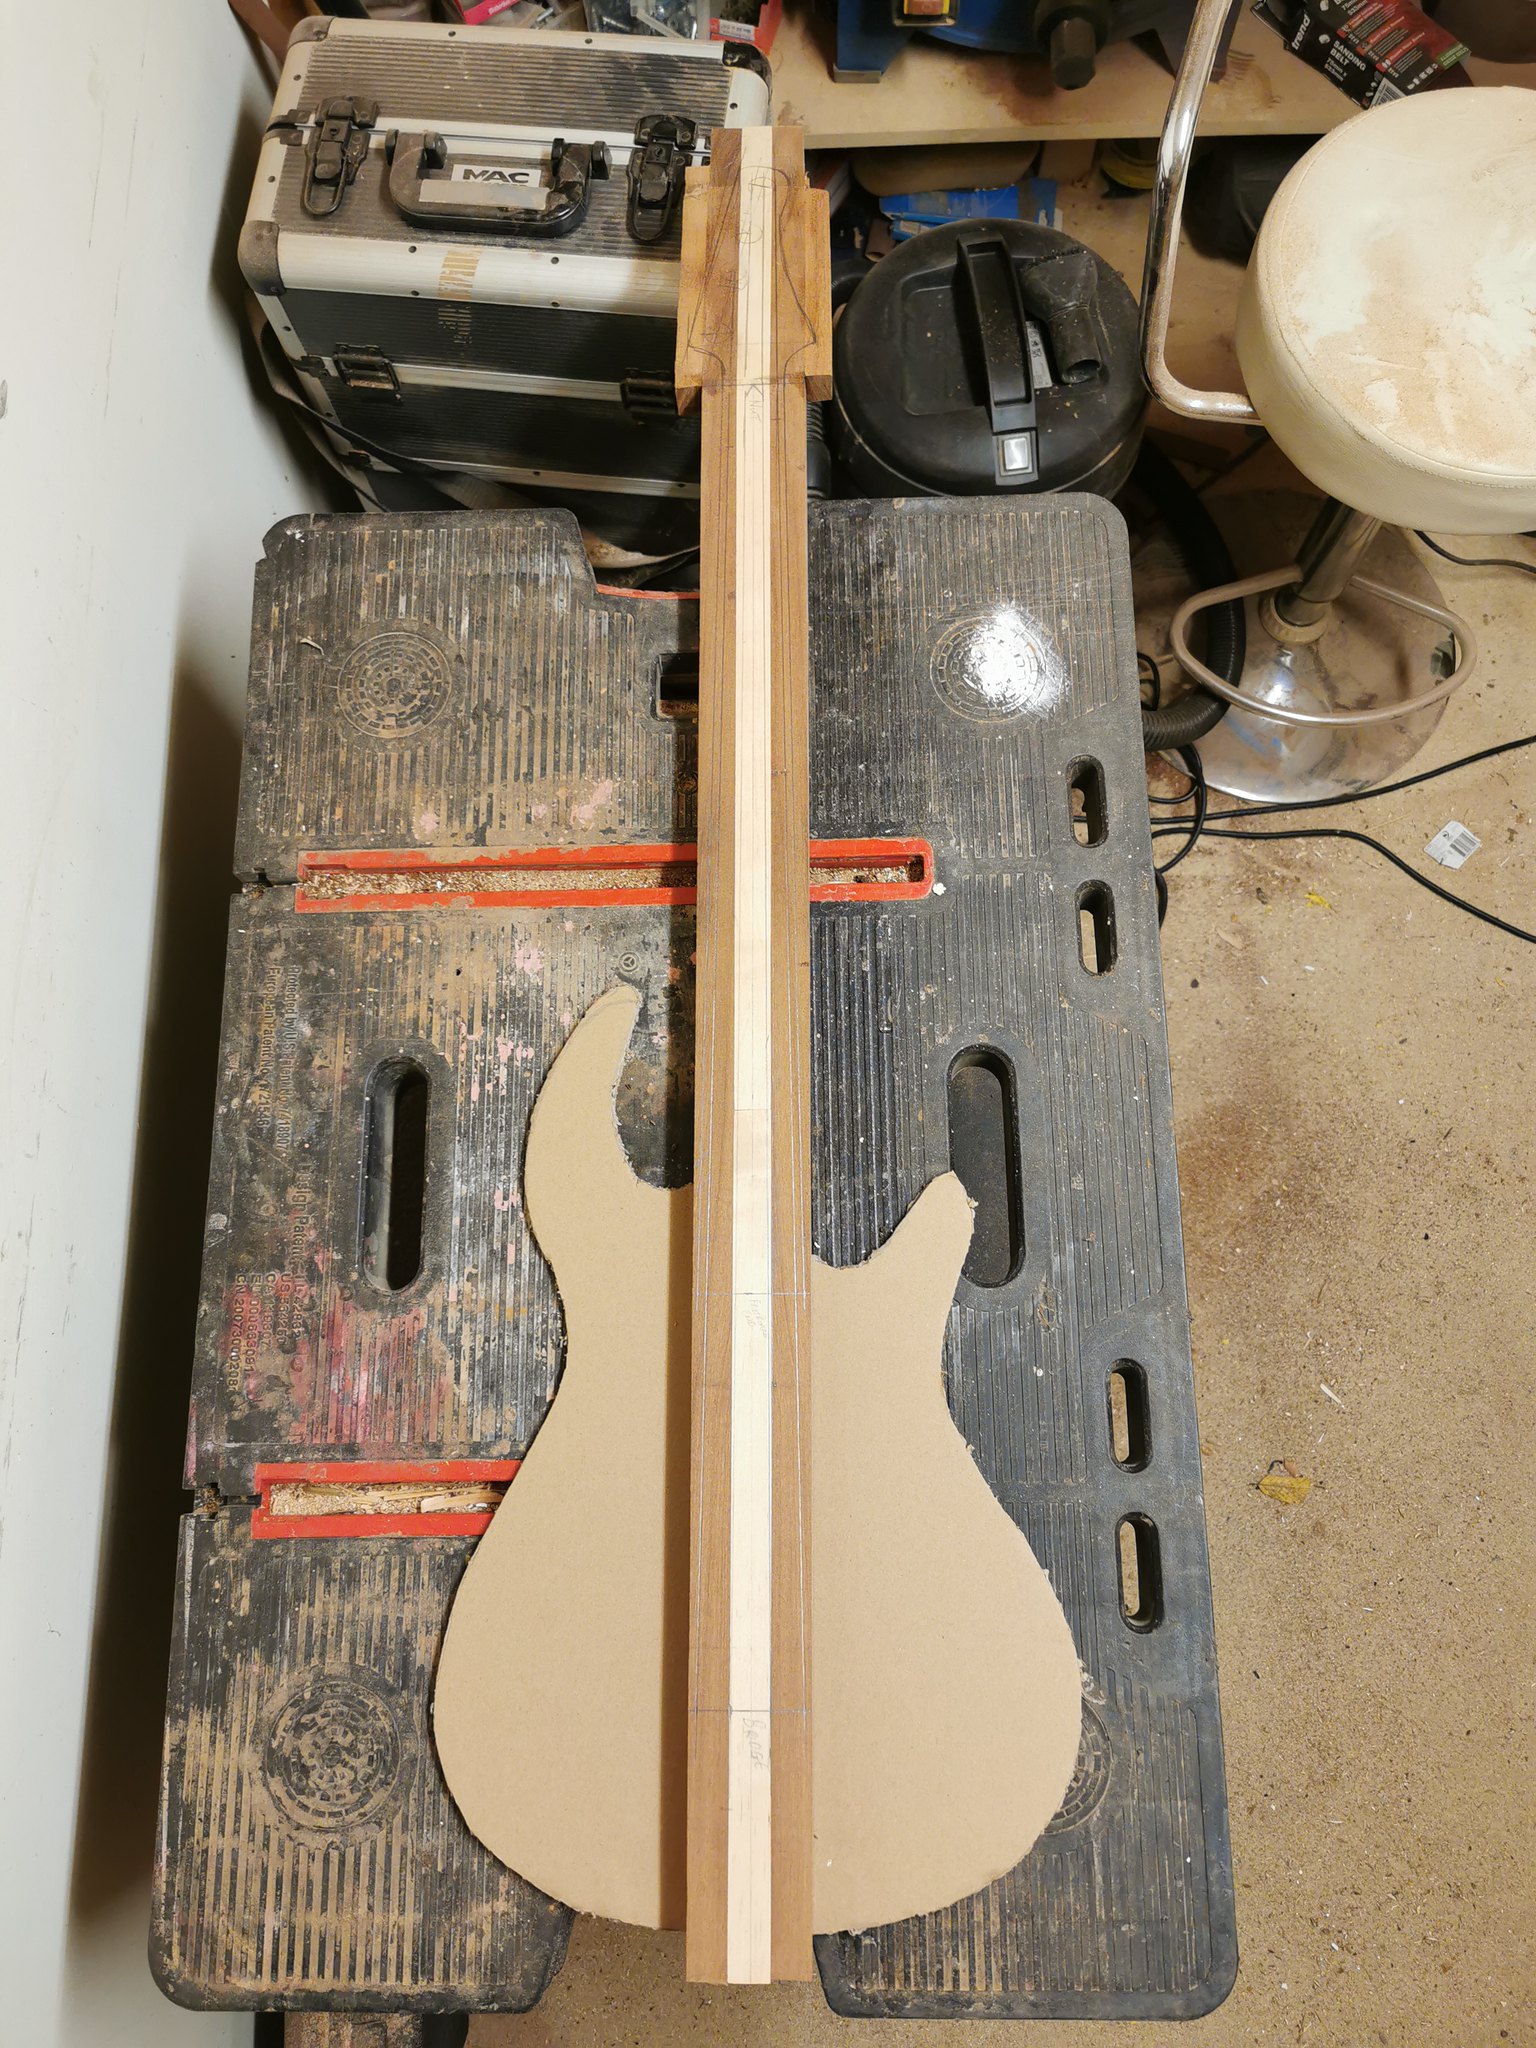
Will get the basic headstock shape cut tomorrow morning and see what else I can do after that.
 LOL 1
LOL 1 Wow! 0
 Wisdom · Share on Twitter
Base theme by DesignModo & ported to Powered by Vanilla by Chris Ireland, modified by the "theFB" team.
Comments
Will shape the wings a bit more once I have the walnut, planning on having the poplar show through on the edges similar to the mockingbird build.
Had a few deliveries today as well - Fretboard, double action truss rod and some walnut boards.
Obviously "hand wound" doesn't normally mean that at all, usually its closer to hand guided. Zhangbucker offers a "Pure Handwound" option, along with some claims on why this is so much better than a machine wound pickup.
Hats of to @JGTay , takes a lot of patience to get this far!
Instagram
Will make the bobbin for the second coil tomorrow and possibly get started on the winds if I have time. Managed to get a good technique going clockwise, will be strange doing a counter clockwise wind now.
Will post a pic in a bit of the finished humbucker.
Not too worried about how it looks as I will be making a cover/surround out of the walnut. The magnets aren't glued in place as I want to get some slightly bigger ones, either 8mm or 10mm. The main thing was getting it made so that I could pre-cut the cavity to size before gluing on the body wings.
Then with a straight edge clamped in place along the lines, scored it with a Stanley knife.
Then followed up with a chisel pressed in all the way around.
And out with the freshly sharpened 6mm chisel to remove the wood.
Tested the rod in place. Managed to get most of the way there, only a couple of mm to go, but had to down tools for the evening.
Should be able to get it finished tomorrow and then I can look at getting the fretboard in place.
Next up was masking tape over the top of the truss rod and then trimmed to stop glue going in the channel.
And then glued and clamped the fretboard in place.
Can see the fret position markers starting to show along the top edge.
Still need to sand level on the sides, slowly getting there, but I wanted to get the new body shape sketched in to give an idea of how it would look and also get the pickup position somewhere close to final location.
Hopefully you can make out the roughly shaped position of the pencil marks. Think it works...
Need to go over the radius again and take it up through the grades, but very pleased with how well the aluminium is looking.
Almost to the line. Just need to level it off and then I can start doing the rounding of the profile.
I then set to work levelling it off and bringing in the profile so that I could assess the repair.
After the glue had dried, it was out of the clamps, then on with shaping and re-drilling through the tuner holes from the back. Gave it a quick clean with white spirit to give an idea of the finished colour.
Then moved onto the back. Did some work on the volute first to get the shape right, then levelled off the back face, cut the shape of the volute into the walnut, then glued and clamped it in place.
After it was out of the clamps, it was shaped and the tuner holes re-drilled from the front. Quick clean up with white spirit again.
And final pic of the day with the neck profile cleaned.
All of it needs plenty of sanding through the grades and the heel transition needs to be sorted out, but overall I am pleased with the progress. Need to decide on final headstock shape yet, think it is close...
The front has a small reveal of the mahogany. Also done fingernail access for the truss rod cover, just need to put some magnets in to hold it in place.
Very pleased with how it is coming along.
A few more updates.
Then did fingernail access for the cover.
Next up was the walnut piece on the other wing.
After the glue had dried did a bit of trimming.
Put an extra piece of walnut on the inside of the cavity cover to give it some extra strength. Have also glued the front piece of walnut on and put an extra piece of walnut in the cavity to give the correct thickness, just need to tidy it up a bit.
Haven't taken any pics of the front yet, had to finish up for the night and get something to eat. Will get the other piece glued on tomorrow and take some pics.
A shot of the edge, down to 27mm at the moment, so should be around the 26mm mark after sanding.
It was out of the clamps this morning and on with the initial shaping.
And after getting some shape to it, gave it a quick clean with white spirit to see how it looks.
Then made a quick cover for the pickup, still needs shaping, but gives a general idea.
May slim down the wings a bit yet, looks a bit fat in the bottom section. Will have to see how I get on this week and whether I can do any in the evenings.
Hopefully I can get a bit more done tomorrow, will see how it goes.
Have got all the sanding done and drilled for the controls, next step is the varnish which I will be attempting to follow @Andyjr1515 methods, wish me luck at getting anywhere near his quality of finishing!